

Why would a small-scale organic farm in Nova Scotia choose to stop tilling the soil (or go no-till)?
This practice, referred to as No-Till, is not an obvious one for a farm such as ours.
In fact, there’s quite a bit of baggage around the term “no-till” – it’s most commonly used to describe larger scale field-crop farms that use herbicides to kill any plants that try to grow (besides ones that are herbicide resistant like Round-Up Ready corn or soybeans), as a replacement for tillage that would otherwise also work to kill or strongly disturb so-called “weeds” (which are simply defined as any plant growing where a human being doesn’t want it).
No-till, in that context, is far from organic, though it is used as a way to help preserve the topsoil. Tillage can have many negative effects, especially when performed too often or at the wrong time. One of these affects is erosion of topsoil – which can happen from wind or water.
However, herbicides are not good for the life in the soil. None of the “-cides” (meaning “killer”) truly only have one effect. An herbicide doesn’t only kill herbs. It affects life generally. The organic farming philosophy is all about life – in the soil, above the soil – and encouraging and promoting life (which includes, by the way, honouring and respect for the role of death as part of the renewal of life – very much showcased in the use of compost).
So, our vision is one of marrying the two – of Organic + No-Till.
Our practices won’t be exactly the same as anyone else similarly practicing Organic No-Till. Farming doesn’t work best as a prescriptive set of practices.
They are unique to our scale (small), our time and abilities (it’s just the 2 of us farming here) and our location and climate (short-season). Here, we can expect in any given year either serious drought or excessive rain (or both). This has been one of our motivating factors – as a risk management strategy. Untilled soil is more resilient to either of these extremes.

This post is the story (so far) of our tillage journey with this land that we are blessed to farm upon. The story has not finished. We are not at the “happily ever after” phase that comes after the neat and tidy “The End” of a story.
The story is really more of a learning journey for us, with lots of continued (and continuing) exploration and experimentation. (Because, as so beautifully expressed by Masanobu Fukuoka, “The ultimate goal of farming is not the growing of crops, but the cultivation and perfection of human beings.”)
With that said, and with an abundance of humility for all that we do not know, we are sharing our story UP TO THIS POINT IN TIME of learning to minimize to the point of no longer tilling (aka “no-till”). Or really just learning more about the soil under our feet and how the life within in and above it reacts to our changing management practices.
While our customers and folks in general may find interest in the remainder of this post, some of its detailed descriptions are likely to be most interesting and/or useful to fellow farmers who are also on this journey.
In the Beginning
When we first moved to this farm at the end of 2011, it had been cut for hay (or more accurately, haylage) for over 10 years. The provincial soil map described the soil as being excessively well-draining to the point of droughtiness and having a low pH (estimating pH to be under 5). When we were looking for land, we always brought a shovel with us and dug into the soil. We intentionally decided upon this spot’s deep sandy loam because we knew it was a texture we could work with based on our experience working on other farms. But, as our soil isn’t clay-rich (subsoil included), we needed to be extra careful with water and fertility management AND work to increase the soil’s organic matter. Amazingly, after doing soil tests, the pH was actually just under 6 (and when we asked our neighbour who had been cutting the hay – he said that 10 years prior, they had spread lime, though none since).
Since neither of us have had off-farm jobs since starting our farm business, and have always needed to make 100% of our livelihood from the farm, we started from the beginning growing veggies and flowers on part of the farm while cover cropping other parts to prepare them for future years (if we had off-farm jobs, it would have been best to just cover crop everything that first year – prepping the fields for crops the following year).
One part of our farm was ploughed (by a neighbor) and then disc harrowed, but in another section we just tilled beds into the field and left the grassy pathways (this was in a section without couch grass….there was a field with a pure stand of couch grass that we cover cropped for 4 years before ever planting a vegetable or flower into).
We hoped the grassy pathways would be a home for and help the beds to re-colonize the fungi and bacteria and other soil organisms (like earthworms or beetles) that were being impacted by the rototiller. Plus we loved that we could easily walk on the pathways no matter the weather and not end up with muddy boots or harvest bins. We mowed the paths with a push mower.

Soil Health
The health of the soil is akin to the health of a bank account. It’s a long-term investment that pays back every year and is extra important in an emergency (like drought or heavy downpours). The philosophy of Organic farming is ALL ABOUT soil health (despite the prevalent idea that it’s all about the lack of pesticide use).
Soil health = plant health = animal (including human) health. And more and more, the recognition that Soil Health = Planetary Climate Health as well.
Soil is not just a substance that holds plants upright. There is a whole world of species living in the soil that humans barely know anything about and are still just scratching the surface of knowledge about. It’s basically like exploring the Galaxy – there’s so much to discover.
Tilling can certainly be done with more or less intention and can cause more or less damage to the soil. But, no matter what, some damage will be done to someone (some species or relationship between species). Fungi (the underground strands of mushroom life that can span miles) are especially sensitive to tillage.
Even before we started exploring the idea of implementing no-till practices on our farm, we have been obsessed and in love with the idea of contributing positively to soil health.
Mulching Against Weeds
In the fields that had been ploughed and then disc-ed, so many grasses started re-growing that we wouldn’t have been able to make a living unless we used some kind of weed barrier. So, we used bio-degradable plastic mulch in the beds that we transplanted seedlings into (for the most part, we did also direct seed into some beds and harvested around the grasses coming up). We left the pathways to grow grasses and mowed them too for the most part, though we did attempt to weed them with a wheel hoe early on. Essentially all weeding in this area was a challenge as there were piles of sod and bunches of tangled couch grass roots turned over everywhere.
That biodegradable plastic mulch really saved our bacon at first though we no longer use it and haven’t for years. The story of the reasons why that is can be found in this blog post.
Because we no longer were using this mulch, we needed to look for other management options: both for weeding (we didn’t want to spend more time weeding) and for soil health (we didn’t want to be cultivating frequently or stale seed bedding throughout the season and really didn’t want to end up with a dry soil crust on top or erosion). You can read more about how we were looking into various options in this blog post.

We started trialing different things: roller crimping (using our rototiller, disengaged, with the PTO turned off, allowing the tines to roll freely over the crop with the weight of the machine pushing down), mowing, landscape fabric, tarping, compost mulch.
Roller Crimping Trials
We trialed 3 methods for transplanted fall brassicas (kohlrabi and romanesco cauliflower) with beds that were:
a) roller crimped rye used as a mulch,
b) flail mowed rye used as a mulch,
c) rototilled soil, bare.
The time it took to transplant into both the roller crimped and the flail mowed beds was much longer and required a trowel (it was also challenging to add amendments) compared to the ease of the rototilled bed. The yields (size of head and bulb in this case) were also smaller in the 2 other beds compared to the rototilled beds, though the flail mowed bed was better than the roller crimped bed and we did end up with more perennial weeds in the roller crimped bed compared to the flail mowed bed.
In our climate, by the time an overwintered cover crop of rye reaches its pollen-shed stage (the ideal stage for roller crimping), there are fewer crops we’re still transplanting (except for faster maturing crops like lettuce and green onions), especially ones that would benefit from the cooler soil temperatures in the undisturbed cover cropped soil.
We’re currently not doing any roller crimping, preferring to flail mow in instances where roller crimping could work, though we may do some again in the future – most likely before sowing more cover crop seed into the rolled mulch.

A few recent resources that relate to this that I want to share:
- EFAO’s Farmer Researcher Project from Field Good Farms on No-Till Broccoli (had fairly similar findings to us)
- A Research project done in Maine through the University of New Hampshire on fall cabbage planted in rolled/mowed/tarped/tilled plots. (this is interesting and inspires us to consider trying out roller crimping and/or flail mowing again – but with the addition of tarping afterwards with black silage plastic for 3 weeks before planting)

Cover Crops
The background info of our story wouldn’t be complete without mentioning our passion for cover crops. We really enjoy growing cover crops (and green manure crops) as a tool for growing our soil’s health in place. Seeing a beautiful, diverse, strong stand of cover crops brings us so much joy, and is, for us, the ideal way to add carbon and nitrogen to the soil.
Early on, our rotation was simple – generally 1 year cover crop – 1 year annual crops (veg and flowers), back and forth. The exception was the plots that we were still preparing to add to our future rotation – which were in multi-year, continuous cover cropping (often to deal with couch grass and some areas of compaction).
We started to feel that this rotation was too constricting for us. That we weren’t able to fully benefit from cover crops within this one year of cover crop. That the timing of planting was too sensitive. And that establishing and terminating the cover crops often resulted in more tillage, negating some of the soil-building effects we hoped cover cropping would bring to our soils.
So, we decided we needed to create a rotation based on our personal needs and wants and management capacity.

Our New Crop Rotation
The crop rotation that we created at this point (4 years ago now) really was the boost we needed to help us figure out how to bring everything together. This is the rotation we are still working with.
It’s a 6 year rotation. 3 years in cover crop, then 3 years in annual vegetables/flowers.
We have some fields that are outside this rotation that are slowly being planted to perennials. Our tunnels are also outside this rotation.

Years 1, 2, & 3 of our Crop Rotation
The 3 years of cover crops does not have its own specific cover crop rotation – we’re still always experimenting with different crops and with multi-species cover crops (aka cover crop cocktails), though the 3rd (last) year of cover crops gets planted to a winter-killed cover crop in the summer. We would like to create a more predictable cover crop rotation for these years. We currently broadcast our cover crop seed, or use a Jang or Earthway push seeder for smaller areas, though we are interested in a no-till drill seeder to help us plant our cover crop seed more effectively.

Year 4 (1st year of veggies)
1st year of veggies – aka the Cucurbit Year. We put down any amendments on the surface of the winterkilled cover crop residue and a thin sprinkling of compost.

We cover the whole plot in landscape fabric (which we pin down with ground staples). This field is planted to cucurbits (planted into holes in the landscape fabric) including Zucchini, Cucumbers, Melons, and Winter Squash.

Benefits:
- The landscape fabric prevents weeds from coming up and protects the top of the soil so that organisms living in the soil can break down that residue on the surface of the soil from the winterkilled cover crops.
- Because we don’t use any pesticides (including organic approved ones) on the farm, having a long-rotation (6 years) between cucurbits has been helpful, as pests like cucumber beetles and squash bugs can overwinter in the soil. We also use row covers early in the plants life (before flowering) to provide a physical barrier for flying cucumber beetles emerging from last year’s cucurbit field looking for food.
- Cucurbits also grow quite happily in soil with breaking-down residue (as those of you with compost piles growing squash have likely noticed).
- Cucurbits also benefit from the added heat from the black landscape fabric (especially important in our short seasons).
- We get the benefits of tarping in terms of preparing a field, but we’re still growing a crop with living roots and lots of photosynthesizing leaves, helping to capture and store carbon in the soil and feeding soil organisms.

One thing that we’ve been considering is habitat for squash bees, native small bees that are specialized in pollinating squash flowers. These ground-dwelling bees require patches of bare soil near to the squash plants. These bees are in fact rarely seen by humans as they pollinate much earlier in the day and are a lot smaller than honeybees or bumblebees you may often notice pollinating your squash blossoms. Because of this, it’s hard to know how well we’re doing on behalf of the squash bees – though we haven’t had issues with squash pollination. (Click here for more info on squash bees!)

Year 5
AKA: The direct-seeding year or quick turnover year
Early in the season, we pull off the landscape fabric as we need it. The field is now free from residue and weeds. We use this field to direct seed into – fast-growing crops like salad mix, arugula, other baby greens, carrots, beets, cilantro, dill, salad turnips and spring radishes.

Compost is only added to beds look like they could use a bit more cover in this year.
It’s been amazing to see the life in the soil, earthworms, yes, but also fungi. Our soil texture and aggregation has improved and it seems tighter (which I know would not be an appealing word to those with very tight, heavy, clay-rich soils – but our soil was quite loose to begin with). We sometimes add a sprinkling of bentonite clay as we’re amending a bed and we’ve been very happy with the results, especially with our onions.

At the end of this season, we try to fill the field with as many crops as we can to overwinter (though some late carrot beds just get a mulching of the carrot tops we leave on top). While not every winter is successful with every overwintered crop (the winters filled with alternating freeze and thaw are the worst), we still take the risk and plant: bulb onions, green onions, asian greens, “cool flowers”, baby kale, carrots, and of course garlic and tulips. The secret, generally, seems to be to time them so they’re not too mature when going into the winter but have still rooted in.
In terms of garlic we now plant them by pushing them lightly into the top of the soil, or planting with a trowel and covering with compost mulch. Tulip bulbs are pushed lightly into the soil surface, and covered with a layer of compost mulch.


Year 6
These overwintered crops are the beginning of the 6th and final year of the rotation (before going back to cover crops – its more of a circle rather than an end). Year 6 is the only year in our rotation where we utilize a deep compost mulch (though for us – “deep” is usually no more than 1 inch of compost).
In spring, after beds of most overwintered crops have been harvested, we broadfork if needed, amend, and then add compost mulch (we don’t re-apply more compost mulch to the garlic or tulip beds that already got an application the fall prior).

Quick note on the compost we use:
For use as a mulch, we use a fairly high carbon/low nitrogen compost made with byproducts from our local forestry and seafood industries, from a company that has an organic certificate for the finished compost (this is very important for us as we’re certified organic). We sometimes purchase an organic-approved manure based compost but we use that one more as an amendment to the soil, rather than as a compost mulch.
Quick note on Phosphorus:
While there are many opinions on the use of deep compost mulch in a no-till or minimal till system, one concern is the addition of more phosphorus than needed which can lead to run-off and water pollution. This concerns us too, which is one of the reasons we limit compost mulch to only one out of 6 years in our rotation and why we don’t use the manure-based compost as a deep compost mulch. Phosphorus becomes concentrated on plants in the seed. Grains are seeds and so, in the Canadian Prairies, many grain (or other seed) farmers are very concerned with lack of Phosphorus – because they make their living by the export of Phosphorus through the seeds they sell. Much of the manure that can be had is from livestock farmers who are feeding grain to their animals (solely grass-fed livestock managers generally keep their manure on their pasture). This means high Phosphorus in the manure. On the other side of the coin, are farmers using manure or manure-based compost, without exporting much phosphorus. Which can lead to build-up of overly high levels. This is why that delightful old-fashioned rotation of grains and then veggies grown with manure held so much wisdom. As we do grow seeds and grains in the form of cover crops, we’ve been considering how we could balance this nutrient out with our rotation – stay tuned – we haven’t figured it out yet.
Quick note on spreading compost:
This was one of the biggest bottlenecks we had on the farm when trying to figure out our system. So, we dreamed up the idea of a self-loading compost spreader with our machinist friend Dan that was designed to perfectly meet our own needs. It removed compost spreading as a bottleneck and worked delightfully well for us. You can read more about it in our blog post.


After the compost mulch is spread, we dibble perfectly spaced holes in our bed (depending on what crop we will be planting) and transplant. This year gets all transplanted crops (besides cucurbits) including flower crops (but not including crops planted into tunnels). We also direct seed trellised peas and dry beans (which we only started growing last year).

We have started to transplant using trowels, because we want to make sure the bottom of the seedling plug is touching soil (rather than just in compost mulch) as our compost isn’t very rich in nutrients and can dry out.

Our plot in Year 6 ends up looking like a patchwork, as we transplant and harvest out and re-plant throughout the season.

While the next picture is quite dramatic (it’s taken after frost-irrigating….you can read more about that in this blog post), I’m using it to illustrate what happens in the fall.

In Year 6, the last year before 3 years of cover crops, some beds are cropped out early and get a rye or rye/vetch cover crop. However, we’re still harvesting from this field after we’ve had many frosty nights. For crops like flowers, we simply leave the plants in the field to serve as a type of cover crop – with their roots remaining in the soil to help hold it and the tops standing as long as possible to continue as habitat or places for birds to explore. The next year, any beds that weren’t planted to cover crop the fall prior, will be planted to cover crops in the spring.
A note about pests (aka other species) OR The benefits of inaction (aka observation or waiting)
We noticed we were starting to have some cutworm problems a few years ago, which we hadn’t had before. Our first step always with any kind of issue is to do a lot of research. Not just how others are “managing” the pest, but rather about the species lifecycle, its habits, and even its role or benefits in the greater ecosystem (which of course everything has – regardless of whether they enjoy the same food we do).
There were lots of recommendations that said that tillage was necessary to deal with cutworms. Though we also know many farmers who till and still have issues with cutworms.
Anyhow, our cutworm issue, while certainly noticeable and frustrating, wasn’t leading us to do anything more than search around when we saw evidence of a fresh cut (cutworms cut the tops off seedlings), look around the nearby soil, and squish the fat juicy culprit. We were definitely not doing this daily. We were pretty much just re-planting places where cutworms had taken out the previous seedling. And that strategy was working out well enough.
Well, this year, we started to see some piles of soil pushed up from below and deposited on top. The character causing these piles of soil was not eating the roots of any of our crops, though sometimes their soil pile pushed out a plant with its roots. We looked into it and found that the piles were the work of this delightfully unique being – the star-nosed mole. Reading about the star-nosed mole filled us with awe and wonder of this incredible world we live in (read this), though some people consider these piles a nuisance, and therefore the star-nosed mole, a pest.

However, the star-nosed mole, is an insect eater (not a herbivore) and eats cutworms (as well as basically all insects, including ones we humans consider “beneficial” like earthworms). The star-nosed mole also basically takes on the beneficial aspect of tillage – moving soil from lower down up and vice versa, and aerating the soil.
We’ve found it so interesting to consider how not tilling the soil has given the opportunity to this other species to make its own livelihood from this land (there are so many insects now) – and who has shown us that tillage is done by other species too.
That livelihood philosophy is really important to us – our goal is making our own living from the farm without impeding many others (of various species) to make their livelihoods at the same time. I’m not very interested in the idea of saying: “this is my spot to make my livelihood and you can go over there in the woods – that is ever-increasingly being clear cut for humans – and stay there and make your livelihood there, away from me.”
For us, high yields include the yields for as many species as possible. Land that produces “yields” for only humans is not very high yielding in our opinion and is certainly not “feeding the world” since this world is made up of a plethora of species. (read more about our ideas around this, if you like, at our blog post here).
Other resources related to this:
- Sharing the Land with All Life – video presentation that we loved from the Oxford Real Farming conference
- The Humane Gardener – beautiful book and also blog
Wrapping it up
Well, this post is quite long already so I’m going to wrap it up. I haven’t mentioned anything about the perennials or the tunnel crops, but that can be for a future post.
I will leave you with a few more resources to check out:
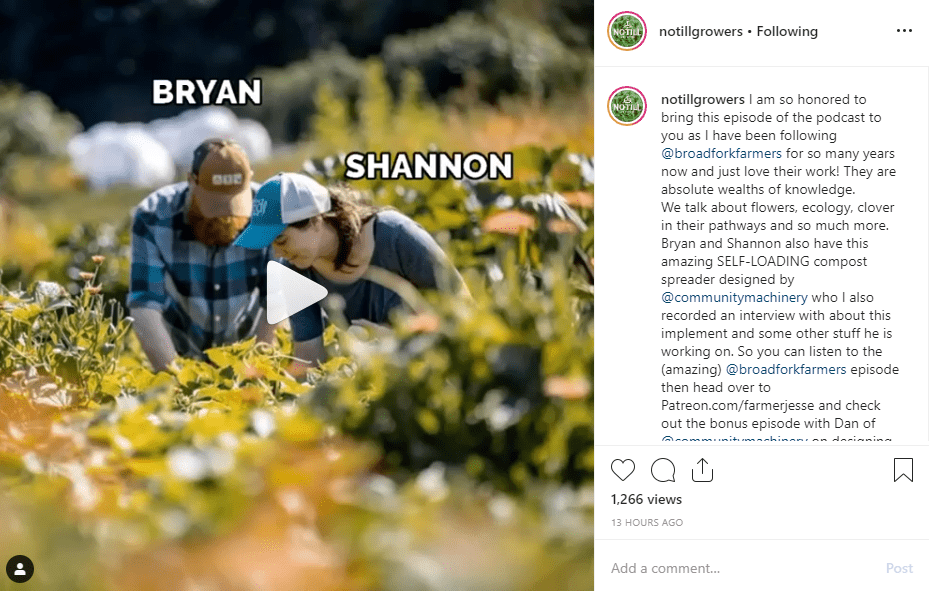
- No-till growers podcast (as well as no-till flowers podcast)….we’ve even been on this podcast
- No-till farmer (even though it’s geared towards a larger scale, and not necessarily even organic, type of farm, there is still lots of good info and we can all learn from each other
- Soil Organic Matter podcasts at No Till Veggies


!")


This was another beautiful read you guys! I miss hearing your philosophies and discussing these topics with you in-person! Wishing you the best! Xoxo