
It’s not hard to ferment vegetables.
Once you learn the basics, you can pretty much ferment any vegetable you can think of, and use any kind of seasonings you want.
The ferment you end up with will nourish you, be delicious, and preserve those vegetables while retaining their nutrients (sometimes even enhancing them!).
Fermenting is both traditional and trendy. Don’t be intimidated, if we can do it with our busy farming schedules, so can you!

Some of our personal favourite seasonal veggies to ferment:
Spring: radishes, salad turnips
Summer: cucumbers
Fall: carrots, kohlrabi, cabbage, daikon radishes
We both learned to farm by apprenticing with successful farmers. And that’s how we learned to ferment too (among other food preservation skills).

(photo by our awesome market helper Cory)
How to ferment:
Choose vegetables that are fresh…not the ones that are already going bad in the bottom of your crisper.
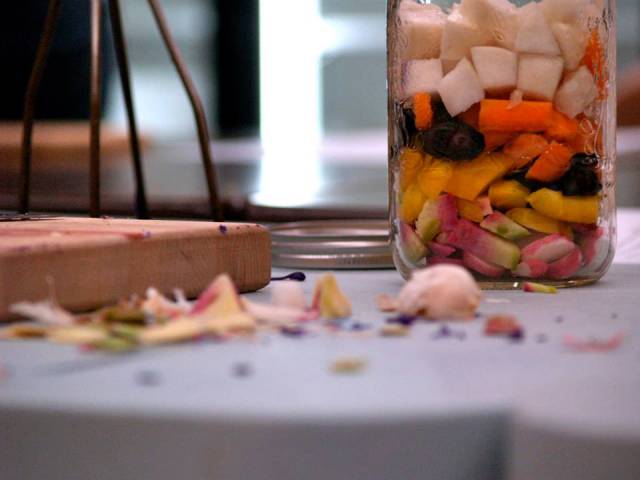
“Seconds” or imperfect veggies, like the carrots in the photo above, are wonderful for fermenting….the majority of our ferments use these perfectly imperfect “seconds.” If you’re in the market for seconds of veggies to ferment, ask us ahead of time if we have any we can bring to market for you. They’ll likely have parts you’ll need to cut off, but they will be discounted.
You need the good bacteria associated with fresh organic vegetables, not the bacteria that helps compost them.
Produce that has been sprayed with pesticides or washed in sanitizer may have lower amounts of the good bacteria that help create the lactic acid that preserves the veggies.
You don’t need to purchase any starter…..good-quality veggies contain everything they need within them to make a great ferment!
Leaving on more of the skin and not overly cleaning your veggies with any cleansers is also a good way to retain beneficial bacteria – and ensure fermenting success.

Cut your vegetables into rounds, matchsticks, grate them, or leave them whole…whatever you want. Bigger chunks will take longer to ferment and stay crispy longer.
The basics of lacto-fermentation are:
- add salt to veggies
- make sure they are submerged in liquids (either a salt-water brine, or the veggies’ own juices mixed with salt, as in the case with sauerkraut)
- keep them at the appropriate temperatures, first to promote the fermenting action and then to slow it down
Typically you want to create a 1.5% ratio of salt to vegetables for fermenting veggies.
For example, 1kg of vegetables or 4 cups would need 15 ml or 1 Tbsp of salt.
Using less salt tends to make things ferment faster. Using more salt slows the process down, leaning towards a sourer product in the end.
We like to use salt that also has good trace minerals in it, such as non-iodized sea salt, Himalayan or Redmond Real Salt.
It is important to limit the amount of air the veggies are exposed to.
So you want to pack them tightly in the jar/vessel you are using, and then make sure they will stay submerged below the juices/brine by placing a weight on them, such as a plate, stones, or a sealed bag filled with water (you don’t want to water it down by accident!).
Putting a plate or towel underneath to catch any juices that bubble over during the process of fermentation is a good idea.
To promote fast fermentation from the start, you want to make sure everything is at the right temperature.
Fortunately, this is pretty easy to do, because people and fermenting microbes are not so different in their preferences and room temperature is ideal (68-72F) for both.
You will want to try your ferment regularly to check on the progress by removing a piece with clean fingers or utensils (you don’t want to introduce other bacteria).
Fervent bubbling will also be a tell-tale sign your veggies are fermenting.
It’s also good to push the veggies down to let any air bubbles out and keep everything submerged. Once you are satisfied with the taste and texture of your ferment, move it to the fridge or a cold cellar for storage.

Fermented Garlic-Dill Pickles
(a good gateway into the world of ferments)
- 3 pounds of small pickling cucumbers (though any cucumbers can be used to make pickles. We’ve made some beautiful pickles from whole lemon cucumbers as well as sliced field cucumbers. You can choose to remove the seeds or not when you slice them. We always leave them on because we’re lazy and don’t mind them. Especially if you make a larger batch in larger containers, larger cucumbers can be used.)
- 1 head garlic, peeled and crushed (there’s no shame in using more than this though. We often put in more for a more garlic-y pickle)
- 1 bunch fresh dill (the flowering tops in particular are typically used, but you can also just use leaves or even dill seed.)
- 5 medium horseradish leaves or oak leaves or grape leaves or cherry leaves to help keep the pickles fresh (this will likely be the hardest ingredient to find at the grocery store…though maybe the easiest to find growing in your neighbourhood or at the local park. You could also try asking a farmer at the farmers’ market if they have any on their property they could bring….it would be a hard item for them to sell to the masses but that doesn’t mean they won’t have some.)
- 1 Tbsp mustard seeds
- 2 Tbsp sea salt
- 1 cup water
- 1 quart wide-mouth mason jars (two) or a 2 quart pickling jar
Steps:
- Wash all the fresh herbs, the cucumbers and the oak/horseradish/grape leaves.
- Place half of the oak leaves, herbs and spices on the bottom of the jar.
- Set half the cucumbers up vertically in the jar so that they fit tightly.
- Add the rest of the herbs and spices.
- Set the remaining cucumbers in vertically.
- Add the salt to the water, mix and pour over cucumbers in jar.
- If needed, add enough water to cover all contents of jar while leaving 1-2 inches of head-space.
- Place a small plate or lid inside and weigh it down to keep on the cucumbers (plastic bags filled with water work well as a weight for…clean rocks also work).
- Cover with the lid. Place in a warm, dark space.
- You can try the cucumbers after a few days to see if they’ve fermented to your liking (flavour and texture). Keep checking back every day or 2.
- When done, place in a cool place like the refrigerator or basement.
Enjoy!
Note: if you don’t enjoy them quickly often and they’ve gotten soft….cut the cucumbers up and make your own relish! We often make large batches and are enjoying them for 6 months or more before we decide to cut them up for relish.


!")


