

Planting Fall Bulbs
Ok, I’ll admit it. When the time comes to plant our fall bulbs, my body is not in the mood for it. After a season of planting, and while we’re still harvesting heavy root crops, we’ve also got thousands of fall bulbs to get in the ground.
But once they’re all in, I feel ready for winter.
Whether you’re just planning on putting a handful in or you’re going big, planting fall bulbs is a great way to start off your next growing season.
On our farm come fall, we’ll be setting in bulbs of garlic, tulips, daffodils, and crocus.
When to Plant
We plant all the bulbs around the same time, which is basically when we get around to doing it before the ground freezes. Ideally, we plan to get them in about 3-5 weeks before the soil freezes. Some years they’ve ended up getting in later than we hoped, but they’ve always done well. We tend to plant our bulbs at the end of October or early November.
Mulching
Mulching is a good idea to help prevent issues with soil heaving during winter, as well as soil eroding.
Straw is pretty traditional as a mulch. We don’t use it as we haven’t found any nearby sources of unsprayed straw and we wouldn’t want to accidently add some with herbicide residues that could affect our bulb crops. It’d be great if we could use our scythe to cut some of our tall grasses before they go to seed, dry them down, and use that as mulch. But so far, the scythe hangs in the tool room waiting.
We’ve heard many people use seaweed. The one and only time we went out to collect seaweed, we were super excited to fill the back of our van with it. When we got it home, we set it out in a heap. Over time, it shrunk down into such a small pile that it barely covered anything.
So I don’t have much experience with mulching with seaweed. I’ve heard that different seaweeds are better as mulch (like eelgrass) whereas others become so dense that it can be tough for young shoots to push their way through. I’d love to hear others’ experiences using seaweed for this purpose.
In the past few years, we’ve been using seafood compost as mulch. It’s weed-free and can hold a lot of moisture.
Where to Plant
It’s important to plant bulbs into well-draining soil. Otherwise, bulbs of all kinds can rot over the winter. If you don’t have any well-drained land, consider a raised bed.
After we’ve planted our bulbs, if we’re not expecting rain, we’ll give them a good watering and they’re good to go.
Fertility
We mix bone meal and compost into the soil before we plant bulbs, otherwise our fertility management is the same across the farm (based on cover cropping, crop rotation, and soil testing).

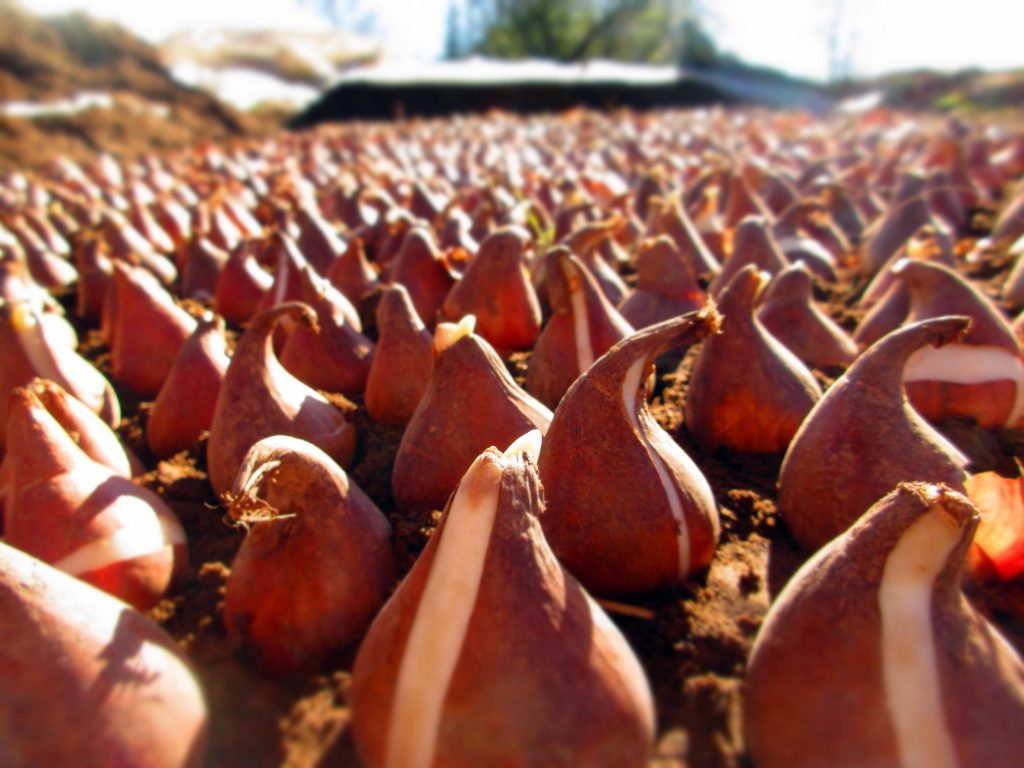
Garlic
We’ve trialed over 90 varieties of heritage garlic over the years. The one we keep coming back to is Music. It’s a variety that was introduced to Ontario from Italy in the ‘80s. We love its large bulb size and reliability in our winters.
We plant ours in rows a foot apart (to make weeding, snapping off garlic scapes, and harvesting easier) with 6 inches between bulbs in row.
Make sure to plant with the pointy end up. The other side is where the roots grow from. I once worked on a farm where a new employee hadn’t been instructed to plant with the pointy end up and so we ended up going through and taking each bulb out and re-planting it.

Tulips
Each year, we order more and more tulip bulbs. We sell tulips in bouquets early in the season and we grow them as an annual for this purpose. That means we plant them super tightly in a garden bed not quite touching, like eggs in a carton. Then we pull the whole plant out, bulb included, to harvest. We cut the bulbs off right before bunching them for sale.

If you’re planning on keeping tulips in your garden to come back year after year in the same spot, you can still plant them tightly in clusters which looks so beautiful when they’re blooming.
For growing as perennials in our garden, I grab a handful of bulbs, dig a hole wide enough to fit them all in and about 6 inches deep. Mix a bit of compost and bone meal in with the soil at the bottom of the hole. I set them in like eggs in a carton and cover with soil and compost mulch on top. I give them a nice deep watering, and that’s it.
The main difference whether I’m growing them as annuals or perennials comes in the spring. For perennials, I either leave them alone or I cut the stem, rather than pulling the whole plant out, and I make sure to leave a few sets of leaves in place to feed the bulb for next year.
Some of our favourite varieties include Menton, Daydream, and Angelique.

Daffodils
I’ve only recently started to get excited about growing daffodils. Mostly due to all the unique and fragrant varieties that are available beyond the standard bright yellow. Some of my favourites include Ice King and Original Poets. I plant daffodils about as far apart as the bulbs are wide.

Crocus
We plant crocuses because of how exciting it is to see some colour early in the spring and it’s one of the few things for bees early in spring. We love seeing the bees crawling over the flowers, covered in pollen and we always vow to plant more for them next year.

Come spring, I’m always grateful to my previous year’s self for having done the work of planting bulbs in the fall. It kicks the next growing season off to a great start!

Shannon wrote this article for Rural Delivery Magazine, in its seasonal gardening column. It’s a great magazine, we highly recommend it!
Find more of our articles for gardeners! We compile our Gardening Resources here on our website.

!")


Pingback: Planting Fall Bulbs – Growing Tips from the Broadfork Farmers | Smart Solution 4.0
Hello! Love the article. We’ve been collecting rockweed from the beach across the road. I started by collecting it in a small pile and running over it with the lawnmower a bunch of times to break it up, and added it to the soil. That worked ok. But the weed kept stalling the mower when it got caught in the blade. So I started collecting it up, and when it’s fresh and supple, chopping it up with a machete on a cutting board. Then letting it rinse in the rain, and dry a bit before adding it to the soil. I’ve also been adding it around plants as a weed barrier/mulch.